![]()
Tjerk Hiddes: Memento of a torpedo explosion
![]()
| The Dutch N-class destroyer Tjerk Hiddes was commissioned on
May 6, 1942 by Lieutenant-Commander W.J. Kruys. Even before
her completion, she was destined for service in the Far East. After she first joined the British Eastern Fleet in Kilindini
in August 1942, she took part in a number of fleet operations against Vichy-French targets in September. By that
time, the United States Navy had already requested the transfer of Tjerk Hiddes and her Dutch sister Van Galen to the
US 7th Fleet, based at Fremantle. Both destroyers, accompanied
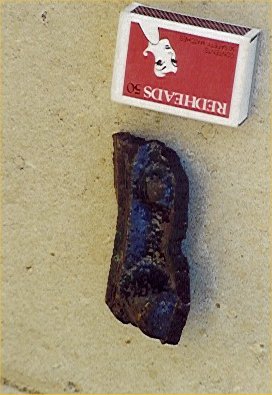
by the cruiser Jacob van Heemskerck, left Kilindini for Fremantle, where they arrived on October 25th. The career of Van Heemskerck and Van Galen with the 7th Fleet would be mostly uneventful, much unlike the Tjerk Hiddes'. In December 1942, the latter made three successful trips to occupied Timor, where hard-pressed Australian and Dutch troops were evacuated. The explosion Having returned to Darwin on December 19, 1942 from her last trip to Timor, Hiddes returned to Fremantle on Christmas Eve, where she berthed at "A" shed, Victoria quay for a much-needed overhaul. During the past three weeks, the ship had steamed almost 7000 miles. Members of the crew and workers from the State Engineering Works started to work on the torpedoes. The pressure in the air chambers had risen as a result of the hot weather, and attempts were made to lower it throughout the week.But on Friday January 8, 1943, these attempts came to a dramatic close. While engineers were working on the torpedoes, the air chamber of one of the torpedoes gave way to the high pressure and exploded. The warhead was blown forward, hitting two [1] Dutch crewmen in the process, while the aft portion of the torpedo was hurled aft and apparently blown overboard. Debris was scattered everywhere, and a hole had been blown in the deck. William T."Tom" Gough, a boilermaker of State Engineering Works recalls: The Tjerk Hiddes explosion in 2003 The piece of shrapnel Frederick Howard picked up was kept as a memento. It was passed on to his son Frank, who in February 2003 donated this piece of shrapnel to the Maritime Museum in Fremantle. Also passed along were a number of accounts by crewmen of Tjerk Hiddes and dockyard workers present at the time of the explosion.
[1] The book "The Kelly's: British J, K and N Class Destroyers of World War II" by Christopher Langtree says three crewmen were wounded.
Many thanks to Frank Howard from Australia |
![]()
Sources
Ph.M. Bosscher "De Koninklijke Marine in de Tweede Wereldoorlog", volume 3
K.W.L. Bezemer "Verdreven doch niet verslagen"
C.V. Gordon "HNMS Tjerk Hiddes - Timor Ferry" (U.S. Naval Institute Proceedings No.2, 1960)
Correspondence with Frank Howard, January 2003
![]()
| Back | Home |